| <<< Test procedure FDM printers | X-Smart 3 >>> |
MK4 from Prusa
The gadget in moving pictures with audio
How Open Is This Gadget?
| Category | remark | Info |
|---|---|---|
| Firmware |
The source code for the firmware developed by Prusa is freely available. |
? |
| Software |
Machine data can be processed with common open source software that generates Gcode. |
? |
| Hardware |
All parts are very easy to replace, common screw types, Prusa provides all spare parts. |
? |
| Electronics |
All components on the mainbiard are labeled. Stepper motor drivers are soldered onto the circuit board and can not be replaced. |
? |
| Website |
Website of Prusa offers firmware downloads, including source code. All other documents for the MK4 are also available for download. |
? |
| Patents |
Prusa makes all of its development work available free of patents. |
? |
About the Gadget
Figure 1: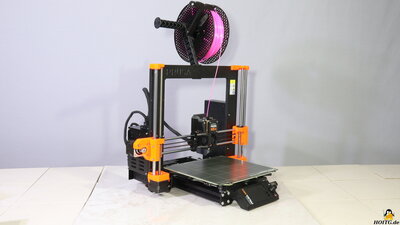
Over the years, the classic design with the print head on the XZ axis and the build plate on the Y axis has been consistently improved by Prusa. The resulting MK4 is designed to be very easy to use and at the same time to deliver a high print quality. High-quality components ensure a long service life for the printer.
Technical Data
| Category | Value | Remark |
|---|---|---|
| Print volume | 250x210x220mm | |
| Dimensions | 500×550×400mm | Without filament spool. |
| Bed heating | Up to 120°C | |
| Hotend | Up to 290°C | |
| Firmware | Prusa Firmware | |
| Extras |
Filament sensor Print data can be transferred via USB stick, LAN or WLAN. |
Package contents
Figure 2: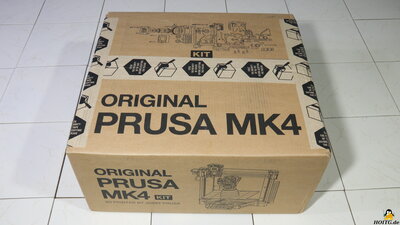
The Prusa MK4 is delivered well packaged with all parts sorted according to assembly steps.
Assembly
Figure 3: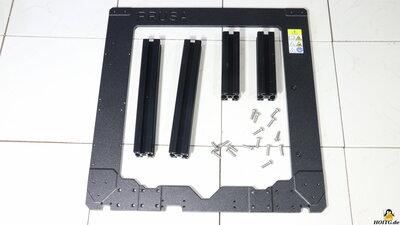
I chose the kit version of the MK4. Beginners should opt for the fully assembled printer, as a little experience in dealing with printer mechanics and tools is required in order to connect all the parts into a functioning device. The latest version of the build instructions in various languages can be downloaded from the manufacturer's website. This is extremely extensive and leaves no questions unanswered. It took me a whole day until I could turn the printer on for the first time.
Mechanics
Figure 4: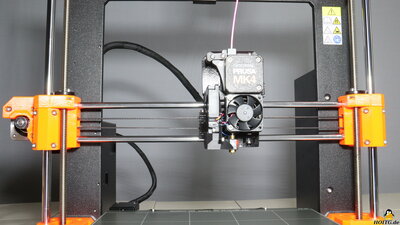
Both the X and Y axes are guided along 8mm round rods with linear ball bearings. The belt tension can be adjusted via screws, which requires the included hex tool. These screws are somewhat hidden, which makes things a bit fiddly. However, the belt tension can be adjusted very sensitively.
The Z-axis is guided by 10mm round rods with drive motors and threaded rods at both ends of the X-axis.
The printer does not have any limit switches for the axes; the firmware determines the stop purely electronically via the stepper motor drivers - so nothing can wear out here.
The maximum print volume is 25x21x22cm and all axes run smoothly.
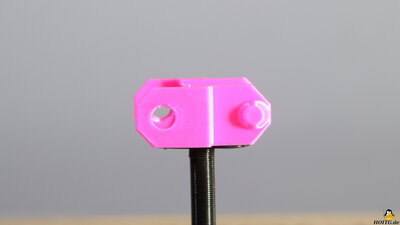
Electronics
Figure 5: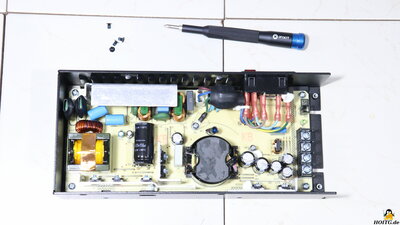
The stepper motor drivers are soldered on the mainboard. On the microcontroller type ST32 runs the firmware developed by Prusa, the source code of which is freely available. The power supply delivers an output voltage of 24V with a power of up to 240W.
Test prints
The G-Code and stl Files of the test prints done with the Prusa MK4 are available as download package.Figure 6:
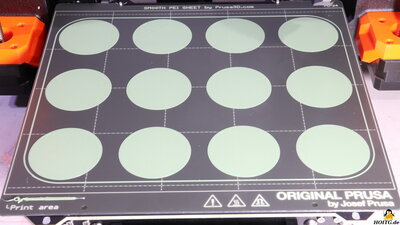
With this first print, the automatic level function is checked. 12 discs, each with a diameter of 50mm, are printed on the build plate. The layer height is 0.2mm, the print speed is set to 15mm/s.
All details on the test procedure.
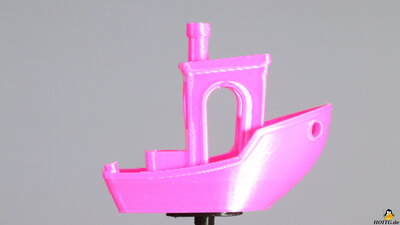
Figure 7:
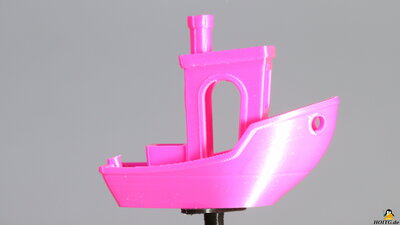
3D Benchy with 30mm per second
All details on the test procedure.
With the test prints of the Benchy processed with increasing speed, it is less important to see what is bad and more important to see what is still printed well.
Read all details on the test procedure.
Figure 8:
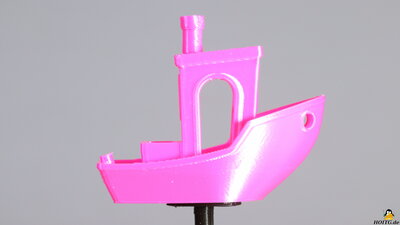
3D Benchy with 60mm/s
All details on the test procedure.
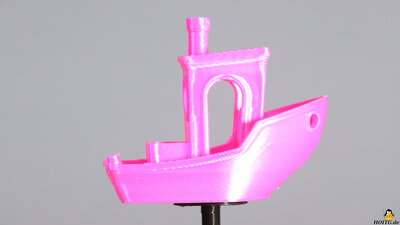
Figure 9:
3D Benchy with 90mm/s
All details on the test procedure.
Figure 10:
3D Benchy with 120mm/s
The cooling works great, even the Benchy printed at 120mm/s in 30 minutes looks very good.
All details on the test procedure.
Figure 11:
In order to print large objects quickly, as much plastic as possible must be extruded per unit of time, which is tested here.
Layer height: 0.4mm
Extrusion width: 0.7mm
A, F, K, P = 30mm/s
B, G, L, Q = 60mm/s
C, H, M, R = 80mm/s
D, I, N, S = 80mm/s
E, J, O, T = 90mm/s
Only at 90mm/s do errors appear on the cylinder surface. The deviation in weight is just 3g.
All details on the test procedure.
Figure 12:
Track link of a robotic vehicle with the dimensions 25x27x12mm
Print time: 14 minutes
My conclusion
The Prusa MK4 is an extremely user-friendly 3D printer with open source hard- and software. Even beginners can use this device to produce high-quality prints without much adjustment work. The support provided by Prusa guarantees that spare parts and firmware updates will be delivered for many years. If you are looking for a 3D printer that simply works, the MK4 is definitely a good choice.| <<< Test procedure FDM printers | X-Smart 3 >>> |
![]()
![]()
![]()